Showing posts with label Anna Maria Horner. Show all posts

Thursday, January 15, 2015

Pattern Hacking Part Two: Reversible Baby Coat

After my unplanned blogging hiatus for the holidays, I'm finally back with part two on my series about pattern hacking, and I'm really excited about this one!  As discussed in part one, I'm using my favorite basic pattern, the Piece of Cake pattern by Anna Maria Horner.  For this part I turned this simple dress pattern into a scrumptious reversible coat!
This is possibly one of my favorite things I've sewn for Bunny since the first Piece of Cake outfit I made her!  And it's a great example of how much your fabric choices effect your result.  And just how easy it is to make anything reversible.  I love reversible options because it means all your seams are inclosed.  No fancy seam finishes needed!  
For my coat I chose and luxurious textured minky for the outer and an interlock knit for the lining.  This knit print is by Valorie Wells, and it's so soft and lovely and reminds me of beaches and warm things!  Even though I've choosen some materials that have some stretch, this would also work perfectly fine in heavier weight wovens.  Corduroy, wool suitings, and twill would give weight to the outer, while you could use soft quilt cottons or silky voiles for the interior.  I'm also using double faced satin ribbon for a tie closure at the front.  You could also do a smaller loop of ribbon and a button.
Now I'm no expert on sewing with minky, but if you do decide to use it there's a few things I learned with this project.  First, there is no way to avoid a mess.  By the end of the day you and your entire sewing space will look like you sprouted some kind of fuzzy fungus.  It's unavoidable.  Using a rotary cutter and mat instead of scissors will help you be more precise with your cutting.  I also found it handy to keep a large plastic trash bag on hand to slide all my scrap pieces into once done cutting, and a small hand vac for whatever I couldn't simply scrape off.
To start I decided to add a collar to my coat.  I used the measurement from the elastic cutting guide on the pattern to determine how long to make my collar.  I chose the twelve month size, so my elastic would be 15 inches.  I subtracted a half inch to account for the seam where you'd sew the elastic together, divided that number in half and drew a rectangle as long as my measurement (which was 7 1/4 inches) and 3 inches wide.  Then I curved the outside edge until it was the shape I wanted.
I also cut the inside edge to be slightly curved so it would lay around the neck better.  In retrospect I should have made this curve much deeper, but it works okay like this.
I cut two back pieces (one outer, one lining), four sleeves (two outer, two main), four front pieces (two outer, two main, and two collar pieces (both outer).  To make the front pieces I simply cut the body piece of the pattern NOT on the fold.  (Don't forget to reverse one side if you're cutting through a single layer!)  You can see here that I cut the main fabric sleeve two inches longer then the lining sleeve, so that I could make a wide cuff at the hem.
Next, I sewed the sleeve and side seams for both the outer and lining fabrics, as per the original instructions.  I used a ball point needle and long zig zag stitch on the knit, but switched to a regular point needle and straight stitch for the minky.  
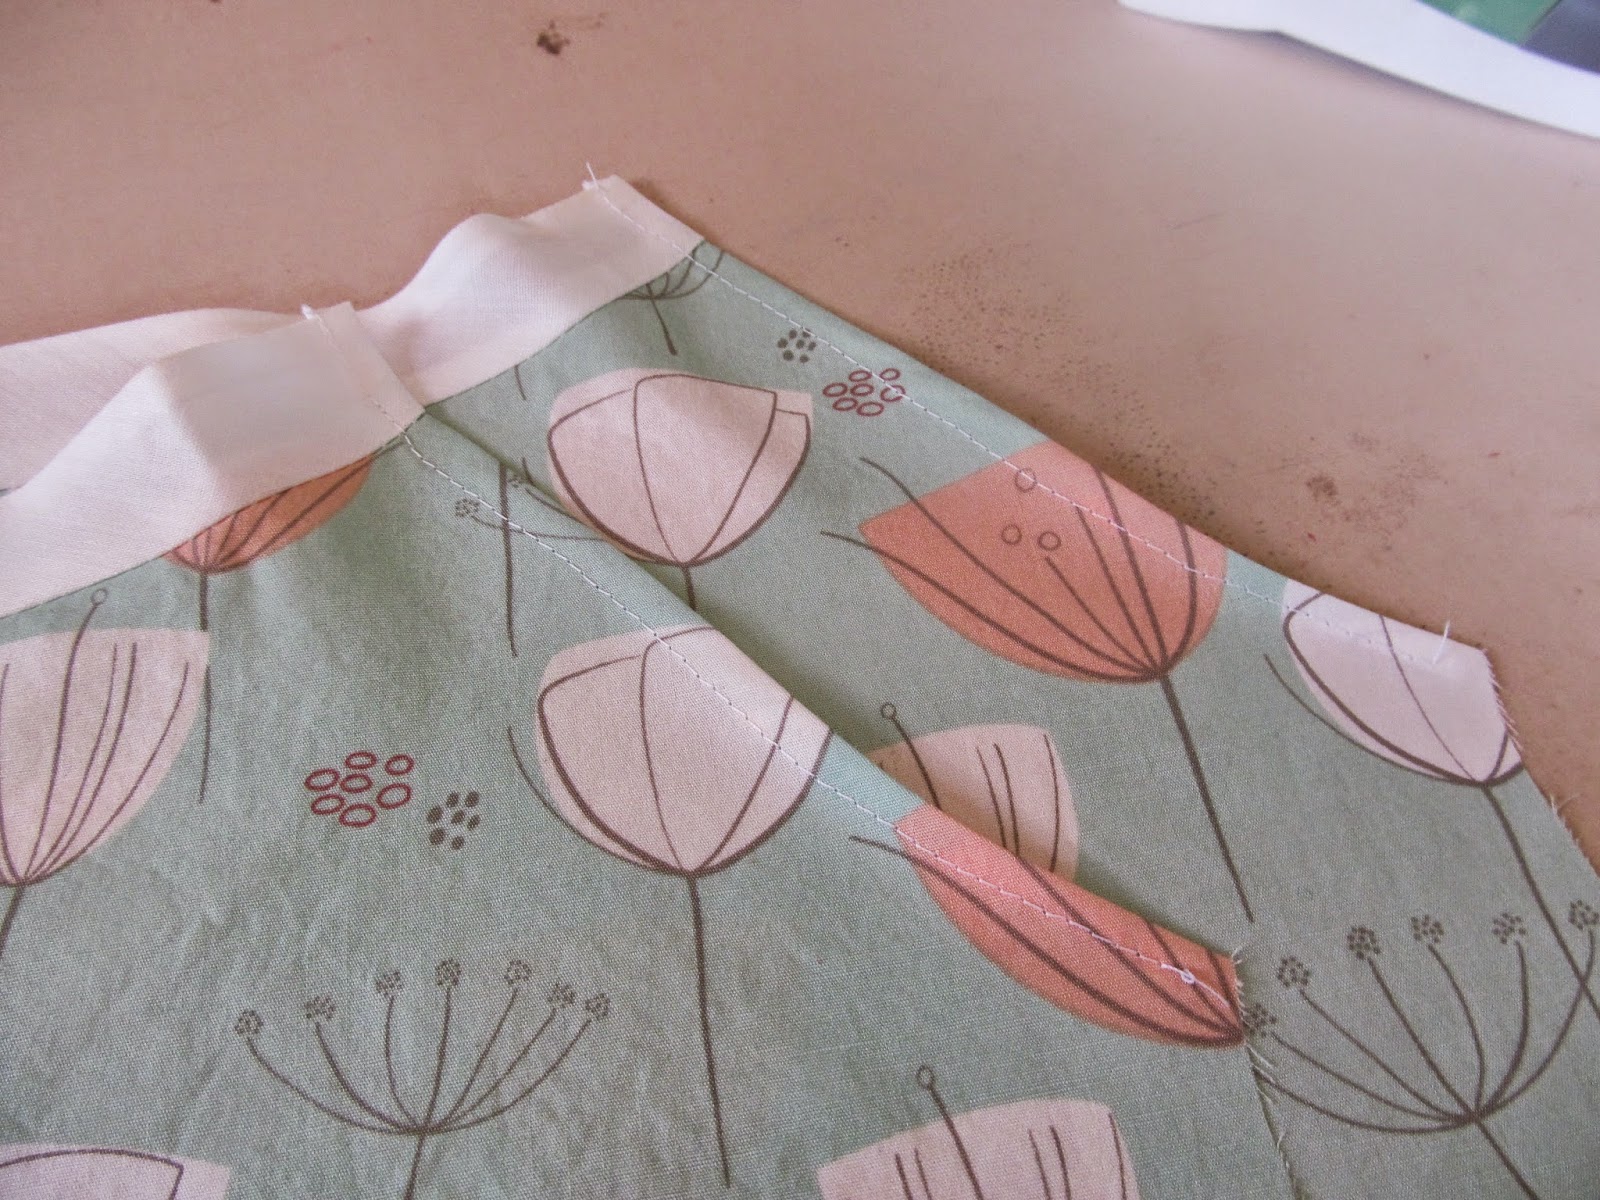
To attach the collar I sewed two rows of basting stitch along the lining neckline, and gathered until it was the same length as the inside edge of your collar.  
Then I sewed just the collar lining to the lining neckline, right sides together.
Since my outer fabric is very thick I decided it would be better to pleat it instead of gathering.  I started in the center and just continued outward, pinching and folding the fabric until it fit the correct length.  I didn't try to be too precise since my fabrics were very forgiving.
More pinning and sewing!  Minky can be pretty slippery.  My machine handles it pretty well, so I didn't use my walking foot.  I did use a lot of pins.
To add the ribbon ties I cut my ribbon to two 22 inch lengths, and sealed the ends with a lighter.
Then I basted them to lining, just underneath the collar on each side of the front.
Next I turned the outer shell inside out, and the lining right side out, and crammed the two together like this.
I started pinning the edges together by matching up the collar seams first. I found it easiest to pin along both fronts going down from the collar, then around the collar, and then across the bottom, being sure to line up my side seams across the bottom.  I also added some pins along the neckline seam to help keep the layers from getting skewed since my fabrics were pretty heavy.
I sewed all along the edge, completely encasing both layers.  I had to go pretty slowly to make sure everything stayed lined up properly.
Next I opened a hole in the side seam with my seam ripper and turned the whole thing right side out through this hole.  Whenever I make anything reversible I always do it like this, instead of leaving an unstitched area on the hem like most patterns call for.  I think it gives a much nicer finish, and it's a lot easier to stitch the lining seam closed again then it is to stitch the edge closed.
Almost done!  Just the sleeve hems to finish!
I folded the outer sleeve hem up a half an inch and stitched it down.
Then I folded the rest of the outer sleeve up over the lining sleeve, to make a wide cuff. 
I opted to hand stitch the cuffs down for a nice clean finish.
Then I just had to hand stitch the lining closed again, and it was all done and ready for cuteness!  All in all, this project only took me a few hours from start to finish, and the result is pretty fantastic if you ask me! 

As you can see here, Bunny is getting so big!  She's crawling all over the place, and takes any opportunity she can to try and walk.  She's so curious and adventurous.  I can't believe she's going to be a whole year old in just two months time!

Stay tuned for part three!
-Sparrow

Monday, November 10, 2014

Pattern Hacking Part One: Piece of Cake Pillowcase Dress

I've said before just how much I love a good basic pattern.  I like the challenge that comes with pattern hacking, and being able to put my own spin on these great designs, so I thought I'd do a little blog series and see just how many variations I can get out of one pattern.  One pattern I've found myself turning to frequently is the Piece of Cake peasant dress by Anna Maria Horner.  In fact, it's probably my most favorite thing I've sewn for Bunny, and it's no surprise I keep returning to make it again and again.  So for this series it seems only natural to use it.  Although I'll be focusing on altering this specific pattern, I hope to give you some tips and techniques for pattern hacking that can be applied to any pattern.  We're going to start with the most basic hack I've done from this pattern.  You can download the pattern for free from the link above if you'd like to follow along.  Lets get started!


This hack is probably the easiest kind of alteration to make.  In essence, all you have to do is leave off the sleeves! Simple, right?  But this wouldn't be much a tutorial if I didn't give you the details, so here we go.

 For this tutorial I'm going to be using the 12 month size.  You will only need the front/back body piece, so don't worry about the sleeve options.  Whenever you're doing a pattern hack it's a good idea to trace off a new pattern piece.  I always trace my patterns onto freezer paper rather than cutting them out from the printer paper.  It saves ink and paper, and you can iron the freezer paper straight to your fabric for easy cutting.  I was able to squeak by with a half yard of fabric by cutting about an inch off the length of the dress.  This worked out okay because I did a smaller hem rather than the blind hem called for by the original pattern.  For anything larger you'll need at least 3/4 of a yard of fabric.  I'm also using 7/8 inch double face satin ribbon, 1 1/2 inch wide bias tape, and some pretty lace trim.  The color of your bias tape doesn't matter, since it won't show.

I really need to recover my ironing board.
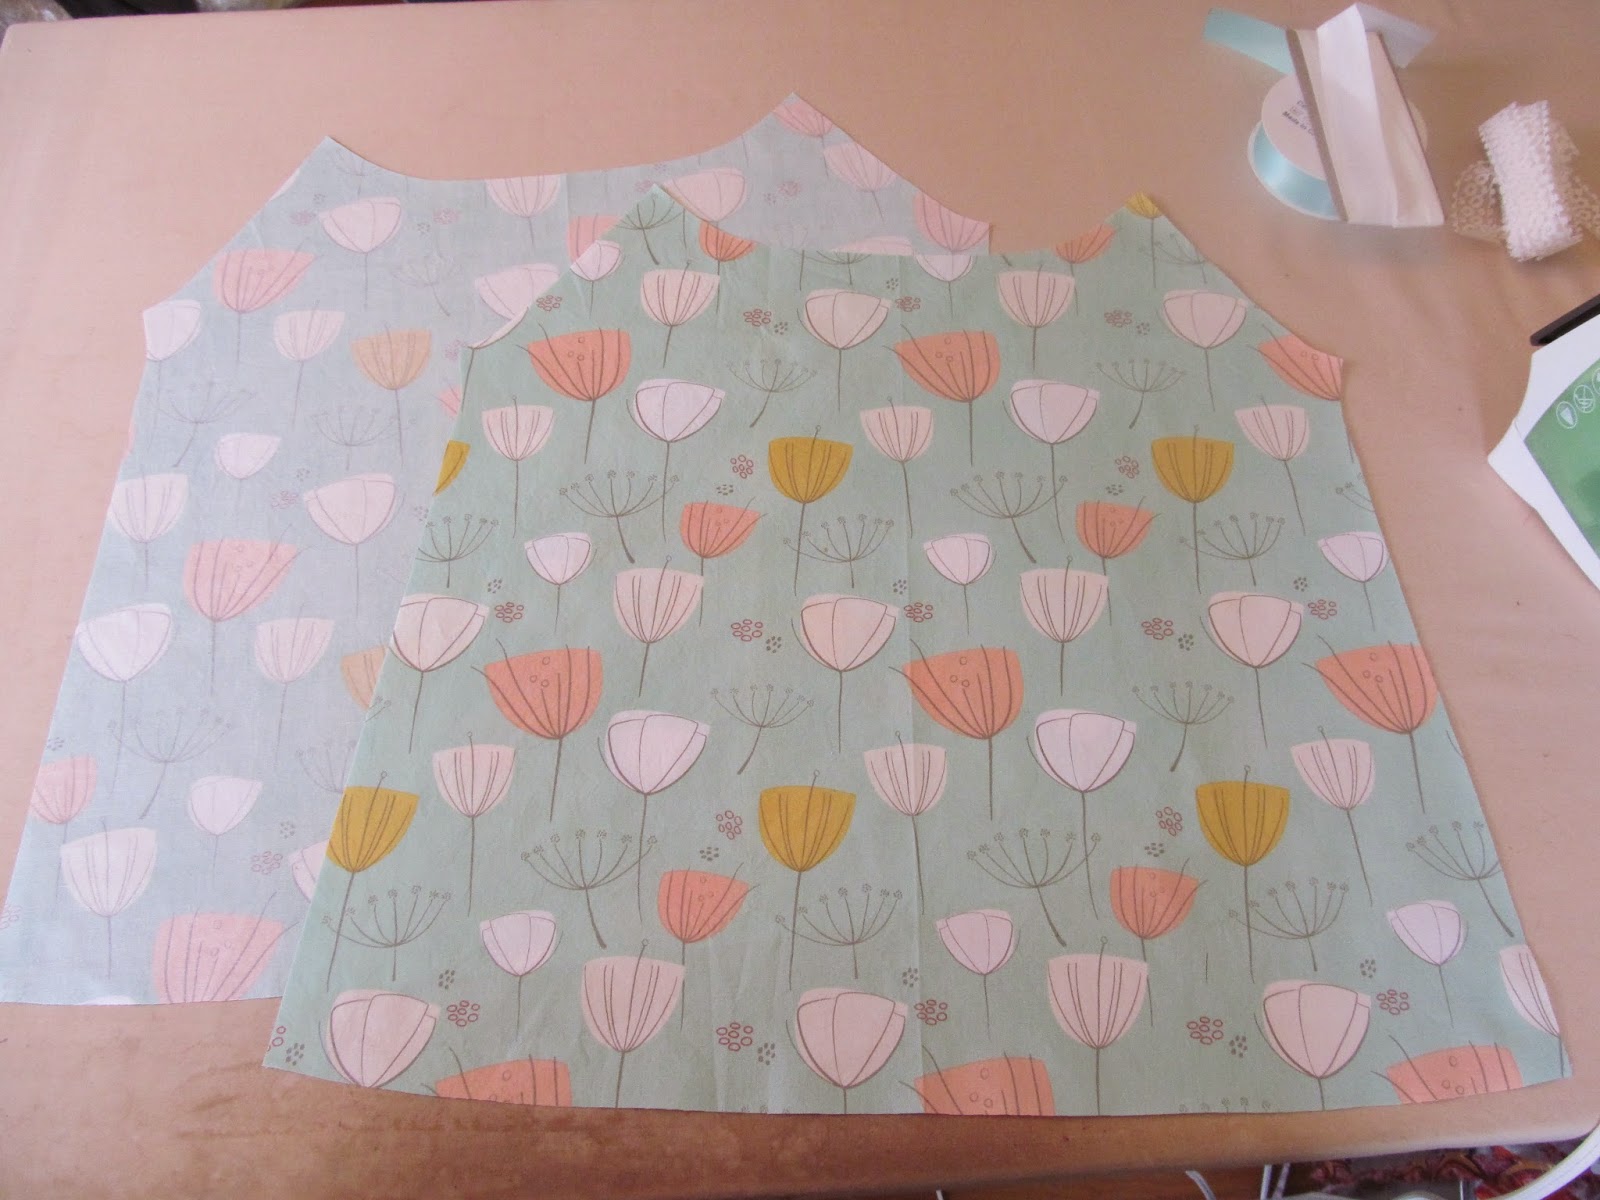
 Cut out two body pieces.  To fit both body pieces onto a single half yard, I folded the fabric in half (selvedge to selvedge, the way it comes on the bolt) and then in half again.  If your fabric is a little slippery you can fold it in half, iron the centerline, unfold it and fold the selvedges in to the center.  (Think of it like folding a really big piece of bias tape.)


 Cut a piece of bias tape a little bit longer then your neckline and iron it open.
With right sides together, line up the top of the bias tape with the neckline and stitch along the top fold line.  You'll need to stretch the tape a bit around the curves.  Do this for both front and back pieces.


 Press the seam allowance up, and trim the end of the bias tape so it's flush with the arm seam.


 Press all four arm seams in by 1/4 inch, and over another 1/4 inch.  Include the edge of your bias tape in this seam.


If the edge of your bias tape sticks out a bit you can trim the corner off like this. 


Stitch the arm seam. 
Seriously.  Ick.  Sorry!
Fold the bias tape over to the inside and pin in place.  You'll need to stretch it out as you sew a bit to get a smooth curve.


 Stitch the bias tape down to finish your neckline on both front and back pieces.


 Next we need to do the side seams.  Since this fabric is on the thin side I opted for french seams.  You can do yours however you like.


 Hem! I folded my hem up by 1/4 inch and another 1/2 inch.  (One of my bad sewing habits is that I generally just eyeball my hem.  Don't be like me.  Measure your hems; they'll be much nicer!)  I also topstitched lace over the hemline to add some interest.


If you did french seams, it's a good idea to trim a little bit out of the hemline where the seams are, so it'll lay nicely.  Otherwise you end up with those lumps and uneven stitches at the side seams.


 Now all that's left is to add the tie!  I'm using ribbon, but you could also make a fabric sash.  To measure my ribbon I looked up the elastic cutting guide for the original pattern, and then added 14 inches.  This makes my bow a little on the small side, but Bunny loves to chew on ribbon so I wanted it to be out of the way.  For a bigger bow I'd add at least another 10 inches.  Be sure to heat seal the ends of your ribbon with a lighter or candle, so they don't fray!


 Put a safety pin on the end of your ribbon or sash, and thread it through the casings made by the bias tape.  Since Bunny is so little and ribbons can be a choking hazard, I topstitched the ribbon into the casing at just one edge once I'd gotten it situated how I wanted.


 And that's it! Super cute and super fast!  I especially love the one I made here with some AMH voile I've been hoarding.  This is probably the fastest thing I've ever sewn, including playing around with new trims.  You could probably make one in under 30 minutes if you skip the fancy stuff. 


I love that I can throw one of these over a ready to wear outfit for an instant handmade upgrade.  So what do you think?  I'd love to see how creative you can get with this pattern hack!  Share your pictures with me on my FaceBook page or on Instagram (@thepumpkinandbunny), or just leave a comment!
-Sparrow

P.S. Here's a sneak peek at the fabrics I'll be using for the next hack!

Saturday, May 24, 2014

I'll have a piece of that cake

      I will admit to actively stalking Anna Maria Horner's blog.  She always has such amazingly inspiring posts, and I adore her fabrics.  So when she posted the Piece of Cake dress pattern last week I knew that Bunny needed one.  Or five.  I just happened to have a small amount of Little Folks voile I've been hoarding.  It was just enough to make the dress and a pair of Knick Knack Knickers to go with it.  It was like destiny.

Ignore my dirty ironing board.
Of course, I just had to adjust the pattern a bit.  Because I can't follow a pattern as written to save my life.  But this dress was just begging for pockets.  Everything's better with pockets, right?

You almost can't even tell they're crooked!  Perfection is overrated anyways.
I also put a small piece of elastic in the top of the sleeves, and added a teeny little ruffle to the neckline. I added the same ruffle treatment to the bottom of the knickers, to tie it all together.


This was my first time sewing a blind hem.  Once I wrapped my brain around how to fold the fabric, it was pretty easy.  I think it turned out rather nicely, despite not having the special presser foot for it.  


I'm ridiculously happy with the results.  And did I mention how much I love this fabric?  It's so light and soft!  Perfect for summer!


Looks like Bunny approves of her new outfit. I had so much fun making it, and the possibilities are endless with this pattern.  That's why I love great basic patterns like this one, because you can dress them up and make them your own.  I think the next one needs a ruffle down the front, and possibly buttons.  What do you think?

-Sparrow