Showing posts with label Knitting. Show all posts

Saturday, September 20, 2014

Itty Bitty Pumpkin Pattern and Link Up

I've had several requests for a pattern for the little pumpkin featured in my last blog post.  It was so easy to make, and turned out so cute!  So here it is. :)  (I apologize for the slightly blurry phone pictures, but I think they are clear enough for you to get the general idea.)

Itty Bitty Pumpkin

Materials:
Scraps of orange and brown worsted or dk weight yarn
US #3 dpns or circulars
Yarn needle

Cast on 30 sts with orange yarn and join in the round (Be sure to leave a good amount of "tail", around 6 inches or so.)
Round 1: K
Round 2: [K2, M1] to end  (45 sts)
Rounds 3-20: K
Round 21: [K1, K2tog] to end
Round 22: K

Cut yarn, leaving a good long tail of about 20 inches.  Put this long tail on a yarn needle, and pull it through all the remaining stitches.

Pull as tightly as you can to gather these stitches together.

There will probably still be a bit of a hole; just oversew across the hole a few times to help close it up.  Pull your long tail to the inside of your pumpkin and back out the top.

Next we need to close the top of the pumpkin.  Using your shorter tail, sew through the bottom edge of your cast on but don't pull these stitches closed yet.

Stuff your pumpkin!  I like to use plain old polyfil, but you could use yarn ends, too.  The more you stuff the firmer your pumkin will be.  I like to stuff it pretty firmly.  Just be sure not to overstuff.  Make sure you leave your long tail poking out of the top, too!

Now you can close the top, by again pulling as tightly as you can and then oversewing the hole.  You can go ahead and tie off the shorter end and burry it into the pumpkin.

To make the pumpkin look like a pumpkin, and not an orange tomato, you need to give it ridges.  Put your long tail (that you left poking out, right?) back on your yarn needle, and sew through the top center and out of the bottom.

Bring your needle back up the top, and again sew down through the top and out of the bottom.  How tightly you pull here will determine how deep your ridges are.

Repeat as many times around as necessary to make your pumpkin sufficiently pumpkin shaped.  I like to use the bottom bumps formed by the cast off to help line up these ridges.

Now for the stem

Cast on 9 stitches in brown yarn and join in the round
Rounds 1-2: K
Round 3: [K1, K2tog] x 3
Round 4: K
Round 5: [K2tog] x 3 (at this point you should have only 3 stitches remaining, and you can switch to i-cord)
Round 6-7: K

Cast off by breaking the yarn and pulling it through all the remaining stitches.  Pull the tail down through the top of stem and out the bottom.  Pulling on it slightly will help give it a little bit of a curve, like a real pumpkin stem.

Use the tails to sew it to the top of the pumpkin, and hide the ends.

Ta da!  You now have an itty bitty pumpkin!  I told you they were easy!  Really, you don't even have to follow the exact stitch or row counts given here.  This is more like a general jumping off point to get started.  Real pumpkins are never the same size or shape, so experiment and have fun!  Even some with textured stitch patterns or cables would be cute!

In fact, I'd love so much to see how creative you can get with this pattern I thought we'd have a little Pumpkin Patch link up party!  And how about a little prize to make it extra fun?  Show me your best pumpkin and I'll pick my favorite one at the end of the link up!  I don't know what the prize will be yet, but I'll be sure to make it something good!  I'll leave the link up open until Saturday, the 27th, so that everyone has a chance to get their pumpkins in.

Happy knitting!
Sparrow

Pumpkin Patch Party Link-Up

Monday, May 19, 2014

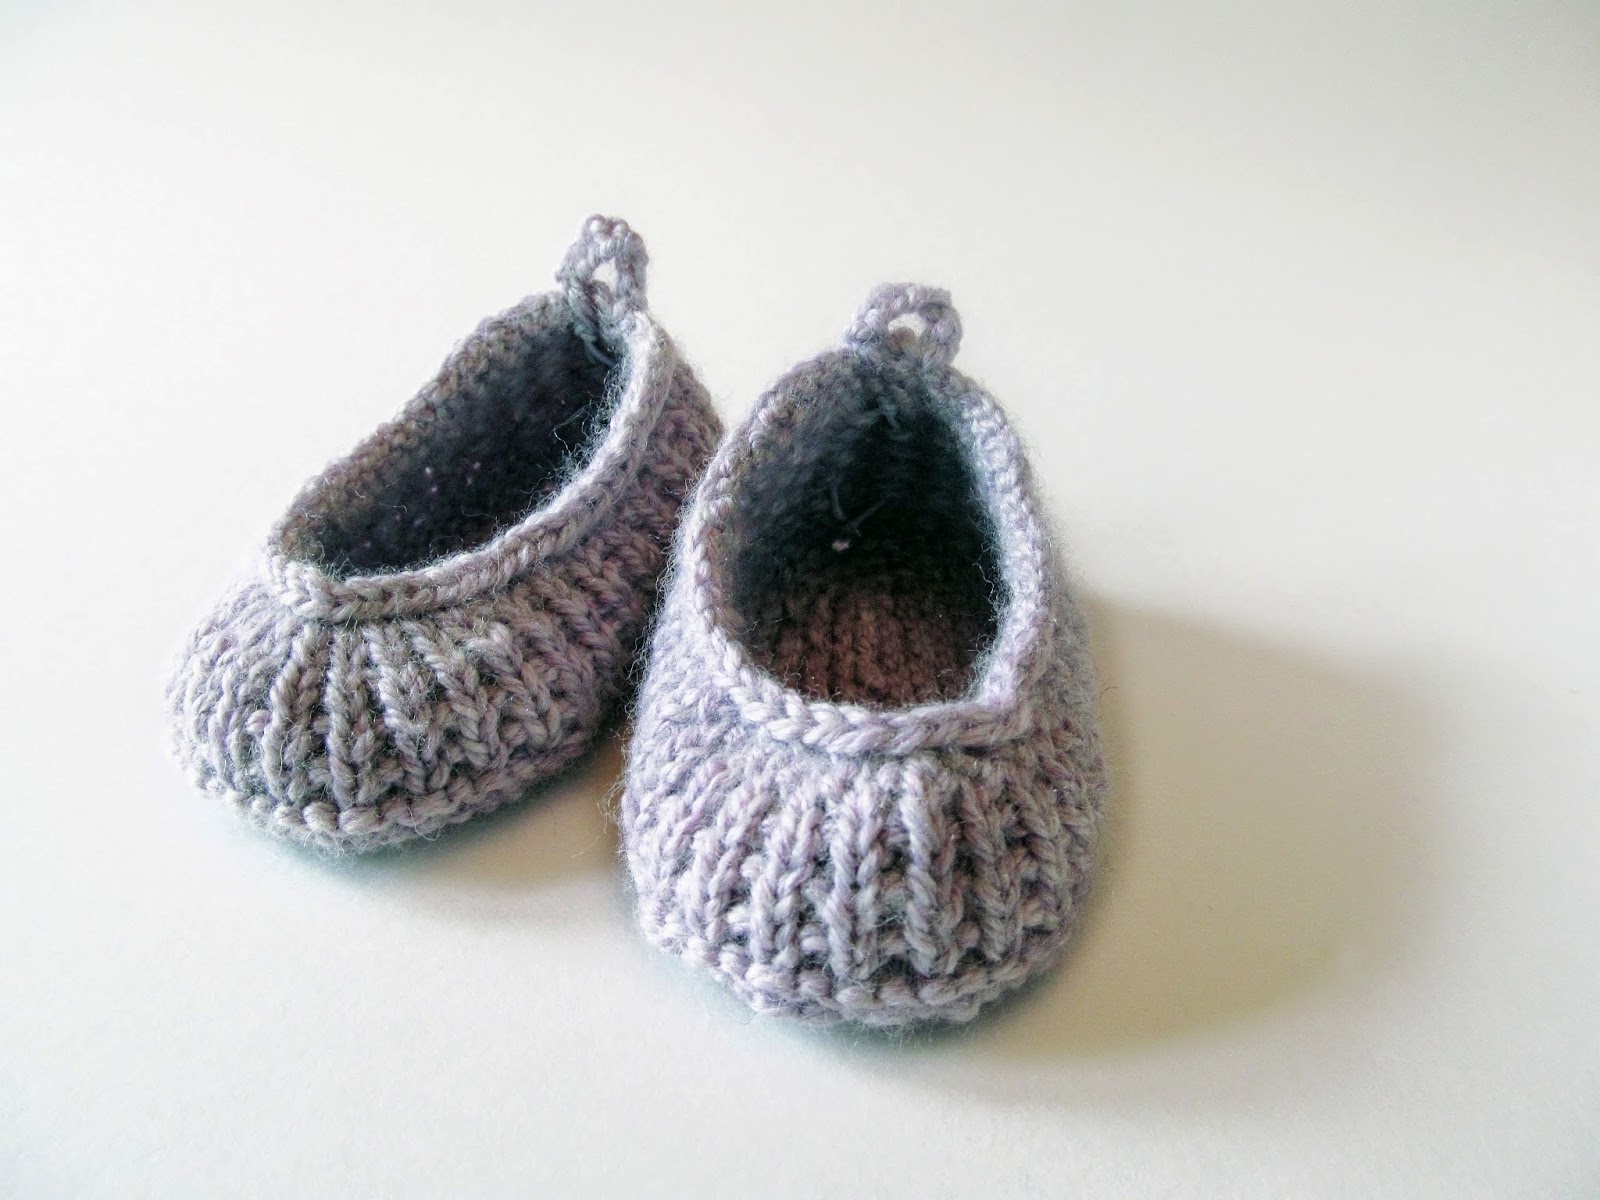
Free Pattern: Petite Jeté Baby Ballet Flats


How cute are these!?  In ballet "jeté" means to jump while kicking out with one foot.  It reminds me of the way babies kick their legs all the time, invariably knocking off whatever sock or bootie you just put on them.  So I designed these little ballet flats with a row of elastic hidden in the cast off, to help them stay on while the kid jeté's away.  The simple design has plenty of room in the toes, and is perfect for customizing anyway you like.  They're fast to knit, too, so you can easily whip up a pair during nap time!   Are you ready?  Allons-y!

Petite Jeté 

Sizes NB (3mo, 6mo, 9mo)

You will need:
Dk weight yarn
US #2 (3mm) dpns
Beading cord elastic (two 10’’ pieces)  - This stuff
large yarn needle

Cast on 25 (29, 33, 37) sts with your preferred seamless cast on 
(Check out my better bootie cast on tutorial here)
Join in the round and distribute sts across either three or four dpns, depending on preference.


I prefer to place my stitches across three dpns, and use the “breaks” between needles in place of stitch markers, but you can distribute them whichever way is most comfortable for you.

The sole is worked in garter stitch starting with a “wrong side” round:
Round 1 and all odd rounds: Purl
Round 2: [k1, m1] twice, k10 (12, 14, 16), m1, k1, m1, k10 (12, 14, 16), [m1, k1]twice
Round 4: [k1, m1] twice, k12 (14, 16, 18), [m1, k1] three times, m1, k12 (14, 16, 18), [m1, k1]twice
Round 6: [k1, m1] twice, k14 (16, 18, 20), [m1, k1] twice , m1, k3, [m1, k1] twice, m1, k14 (16, 18, 20), [m1, k1]twice
Round 8: k1, m1, k17 (19, 21, 23), [m1, k2] twice, m1, k5, m1, [k2, m1] twice, k17 (19, 21, 23), m1, k1
You should have a total of 57 (61, 65, 69) stitches at this point.
Knit 4 (4, 6, 6) more rounds of garter stitch, ending with a knit round


Now for the top of the bootie, which is knit in 1x1 garter rib:
Round 1: k1, p1 
Round 2: k
Repeat these two rounds for a total of 8 (8, 10, 10) rounds, ending with a k round.
Knit one more round of k1,p1
Next work decreases to shape the toe:
k20 (20,  22, 22), ssk 4 (5, 5, 6) times, k1, k2tog 4 (5, 5, 6) times, k20 (20,  22, 22)
Now we need to make a short row across the back of the heel:
[k1,p1] across 9 sts, w&t, p9, [p1, k1] across 9 sts, w&t, k9
You should end up back at the beginning of the round.

The next round will be the bind off round, but before we do that we need to put in the elastic.  This step is totally optional, but it will make a big difference in helping the booties stay on.  Cut a piece of elastic 10 inches long, and thread it onto a large yarn needle.  Starting at the beginning of the round at the back of the heel, thread the elastic through the stitches without taking them off the needles.  (This is the same way you’d put in a lifeline, only using elastic instead of waste yarn.)  If you find that it gets a bit tight, you can slip your stitches onto smaller dpns to make it easier.  Be careful not to pull the other end of you elastic too far through!
  

Bind off using a stretchy bind off.  I prefer the k2tog tbl bind off.  (K2 tog, slip resulting stitch back to the left needle, k2tog tbl, and repeat.)  Tie an overhand knot in the elastic at the back of the heel, and trim the tails to around an inch long.  The elastic should be completely hidden under the cast off, resulting in a magically super-stretchy edge.


You want the elastic to be snug enough to help the bootie stay on, but not so snug that it distorts the shape.  Tuck the tails into the purl bumps on the inside of the bootie.  Sew in your ends, and you’re done!


I like to add a crochet chain with the bind off tail, and make a little tab to help pull the bootie on.  I can just picture these dressed up with a little bow, or buttons, or ribbon… the options are endless! 


Now, this pattern hasn't been tested, so if you find anything wrong with it or have any comments about sizing, let me know!

Happy Knitting!
-Sparrow

Wednesday, May 14, 2014

The Better Bootie Cast On Tutorial

     Awhile back, while I was still pregnant, I decided that Bunny would need a pair of booties before she entered the world.  I'm not entirely sure why I was so fixated on her needing them. Especially since we all know that there isn't a bootie or sock in the world that will stay on a baby's foot.  But it became a bit of an obsession for me.  And they had to be perfect.

     I don't know how many patterns I went through, looking for one that would suit me.  But all I ended up with was a pile of half-made booties that weren't quite right.  Somehow, through the haze of frustration and hormones, I realized what was wrong.  I don't like bulky seams if they aren't needed.  Especially in baby wear, since they can be really sensitive to that sort of thing.  So, I had been making all my booties seamlessly, using Judy's Magic Cast On.  Which is a fantastic cast on.  If you're making toe-up socks.  If you're making booties, however, it's not so great.  The resulting shape from this and other seamless cast on's makes a bootie that is shaped like a boat.  And no one's foot is shaped like a boat.  Once I realized this was the problem, I spent several days looking for solution, and finally came up with this method.  And so, I present: